
Easy Homemade Bites
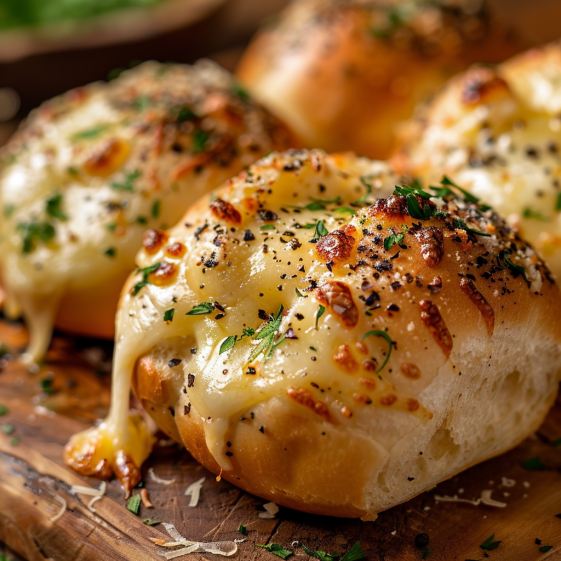
Indulge in the savory delight of homemade garlic bread like never before with our easy-to-make Cheesy Garlic Bread Bombs. These bite-sized treats are perfect for snacking, entertaining, or as a side dish to complement your favorite meals.
Edit
Full screen
Delete
cheesy garlic bread bombs recipe
Our cheesy garlic bread bombs recipe is designed to be simple, requiring minimal ingredients and effort, yet yielding maximum flavor. With this easy recipe, you can enjoy the delightful combination of melted cheese, aromatic garlic, and soft bread in every bite.
Key Takeaways
- Simple and easy-to-follow recipe for homemade garlic bread bombs
- Delicious combination of melted cheese, garlic, and soft bread
- Perfect for snacking, entertaining, or as a side dish
- Requires minimal ingredients and effort
- Great for complementing your favorite meals
The Irresistible Appeal of Cheesy Garlic Bread Bombs
There’s something undeniably appealing about biting into a warm, cheesy garlic bread bomb, fresh from the oven. The combination of gooey cheese, savory garlic, and soft bread is a winning formula that explains why these savory snacks have become a favorite among many.
Why These Savory Bites Are So Popular
The popularity of cheesy garlic bread bombs can be attributed to their flavor and convenience. They’re easy to make using a simple garlic bread recipe and are perfect for grabbing on the go or serving at gatherings. The combination of melted cheese and garlic inside soft bread is irresistible, making them a hit at any event.
Perfect Occasions for Serving
Cheesy garlic bread bombs are versatile and can be served at various occasions. They’re ideal for parties, family gatherings, or as a comforting snack during movie nights. You can also serve them as an appetizer or side dish, paired with your favorite dipping sauces, making them a great addition to any meal featuring cheesy bread bites.
What You’ll Need: Ingredients for Perfect Cheesy Garlic Bread Bombs
Let’s dive into the ingredients needed for these mouth-watering cheesy garlic bread bombs. The quality of your ingredients directly impacts the flavor and texture of your final product.
Basic Dough Ingredients
The foundation of your cheesy garlic bread bombs is the dough. You’ll need all-purpose flour, active dry yeast, sugar, salt, and warm water. These ingredients come together to create a soft, yet sturdy dough that can hold its filling.
Cheese Filling Components
The cheese filling is what makes these bread bombs irresistible. You’ll need a blend of cheeses for the best flavor.
Best Cheese Varieties to Use
Mozzarella is a must for its melting properties, while Parmesan adds a salty, umami flavor. You can also experiment with other cheeses like cheddar or provolone.
Optional Flavor Enhancers
Consider adding some dried herbs like oregano or basil to your cheese filling for an extra layer of flavor.
Garlic Butter Mixture
The garlic butter is what gives these bread bombs their signature flavor. Mix softened butter with minced garlic, and a pinch of salt and parsley for freshness.
| Ingredient | Quantity | Purpose |
| All-purpose flour | 2 cups | Dough base |
| Active dry yeast | 1 packet | Rising agent |
| Mozzarella cheese | 1 cup shredded | Cheese filling |
| Parmesan cheese | 1/2 cup grated | Cheese filling |
| Butter | 1/4 cup | Garlic butter |
| Garlic | 3 cloves | Garlic butter flavor |
Essential Kitchen Tools and Equipment
To simplify the process of making cheesy garlic bread bombs, you’ll need some essential kitchen tools and equipment. Having the right utensils not only makes the preparation smoother but also ensures that your bread bombs turn out perfectly.
Must-Have Utensils
To start, you’ll need some basic kitchen utensils. A large mixing bowl is necessary for combining the dough ingredients. A wooden spoon or dough whisk is ideal for mixing, while a lightly floured surface is required for kneading the dough. Additionally, a rolling pin will help you roll out the dough to the right thickness.
For shaping and baking, you’ll need a baking sheet lined with parchment paper and a cookie scoop or spoon to portion out the dough. A pastry brush is also essential for applying the garlic butter mixture.
Optional Tools That Make the Process Easier
While not necessary, some tools can make the process of making cheesy garlic bread bombs easier and more efficient. A stand mixer with a dough hook attachment can significantly reduce the kneading time. A garlic press can help you extract garlic juice efficiently, and a silicone baking mat can prevent the bread bombs from sticking to the baking sheet.
Using a digital thermometer ensures that your oven is at the correct temperature, which is crucial for baking the bread bombs to perfection.
| Tool | Purpose |
| Large Mixing Bowl | Combining dough ingredients |
| Wooden Spoon/Dough Whisk | Mixing dough |
| Rolling Pin | Rolling out dough |
| Pastry Brush | Applying garlic butter |
| Cookie Scoop/Spoon | Portioning dough |
Edit
Delete
“The right tools make all the difference in baking. With the proper equipment, you can ensure your cheesy garlic bread bombs turn out perfectly every time.”
Preparing the Perfect Dough
The foundation of exceptional Cheesy Garlic Bread Bombs lies in the preparation of the perfect dough. A well-crafted dough provides the ideal base for the cheesy, garlicky filling, ensuring that each bite is both flavorful and satisfying.
Mixing the Ingredients
To start, combine 2 cups of warm water, 2 teaspoons of sugar, and 1 teaspoon of active dry yeast in a large mixing bowl. Let the mixture sit for 5-10 minutes, or until it becomes frothy. Then, add 3 cups of all-purpose flour, 1 teaspoon of salt, and 2 tablespoons of olive oil. Mix the ingredients until a shaggy dough forms, using either a stand mixer or a wooden spoon.
Kneading Techniques
Effective kneading is crucial for developing the gluten in the dough, which gives the bread its structure and texture. Using a stand mixer with a dough hook attachment, knead the dough for 5-7 minutes. Alternatively, knead the dough by hand for 10-12 minutes, until it becomes smooth and elastic. As Julia Child once said, “The only time to eat diet food is while you’re waiting for the steak to cook.” Proper kneading is key to achieving that perfect steak-accompanying bread.
Proper Rising Time and Temperature
After kneading, place the dough in a greased bowl, cover it with plastic wrap or a damp cloth, and let it rise in a warm, draft-free area. The ideal temperature for rising is between 75°F and 80°F. Let the dough rise for about 1 hour, or until it has doubled in size. This step is critical for developing the flavor and texture of the bread.
Complete Cheesy Garlic Bread Bombs Recipe
With our dough perfectly prepared, we can move on to the exciting step of creating our cheesy garlic bread bombs. This process involves several key steps that will ensure our bread bombs are not only delicious but also visually appealing.
Dividing and Shaping the Dough
The first step in shaping our cheesy garlic bread bombs is to divide the dough into equal portions. This ensures that each bread bomb is uniform in size and bakes evenly. To do this, you can either use a kitchen scale to measure out equal pieces of dough or simply divide the dough into equal parts by hand.
Once you have your portions, roll each piece into a ball and then flatten it slightly into a disk shape. This will provide a surface area for the cheese filling and help in sealing the bread bombs effectively.
Adding the Cheese Filling
Now it’s time to add the cheese filling to our dough disks. Place a generous amount of your preferred cheese mixture in the center of each disk. Be careful not to overfill, as this can lead to cheese leakage during baking.
Tips for the perfect cheese filling:
- Use a mix of cheeses for a richer flavor.
- Keep the filling cold to prevent it from melting too quickly.
- Don’t overfill to avoid leakage.
Sealing the Bombs Properly
To seal the bread bombs, fold the dough over the cheese filling to form a ball, and press the edges together firmly. Make sure the seal is tight to prevent the cheese from escaping during baking.
A helpful tip is to dip your fingers in a little water and then press the edges to seal them more effectively.
Applying the Garlic Butter
The final step before baking is to brush the tops of our bread bombs with garlic butter. This not only adds flavor but also gives the bread a golden brown finish.
To make the garlic butter, mix softened butter with minced garlic and a pinch of salt. Brush this mixture generously over the bread bombs, ensuring they’re fully coated.
By following these steps, you’ll have perfectly crafted cheesy garlic bread bombs ready to be baked to golden perfection.
Baking to Golden Perfection
Achieving the perfect golden brown crust on your cheesy garlic bread bombs is a matter of precise oven temperature and timing. To ensure your cheesy garlic bread bombs are baked to perfection, it’s crucial to understand the baking process.
Oven Temperature and Timing
Preheat your oven to 375°F (190°C). The ideal baking time is between 12 to 15 minutes, depending on the size of your bread bombs and your oven’s performance. It’s essential to keep an eye on them to avoid overcooking.
Visual Cues for Doneness
The cheesy garlic bread bombs are done when they turn a golden brown color. You can check for doneness by gently lifting one of the bread bombs; if the bottom is golden brown, they’re ready. Visual inspection is key to avoiding overcooking.
| Baking Time (minutes) | Oven Temperature (°F) | Result |
| 12-15 | 375 | Golden Brown |
| 10 | 375 | Pale |
| 18 | 375 | Overcooked |
Finishing Touches
Once baked, brush the cheesy garlic bread bombs with additional garlic butter for an extra burst of flavor. Serve warm.

Edit
Full screen
Delete
golden brown garlic bread
Pro Tips for Irresistible Cheesy Garlic Bread Bombs
To make irresistible cheesy garlic bread bombs, it’s crucial to master a few key techniques. The journey to creating these delicious treats involves more than just following a recipe; it requires understanding the nuances that elevate them from good to great.
Cheese Selection Secrets
The foundation of great cheesy garlic bread bombs starts with the cheese selection for garlic bread. A blend of mozzarella for its melting properties and a sharper cheese like cheddar or parmesan for flavor depth works well. Experimenting with different combinations can help you find your perfect mix.
Garlic Preparation Techniques
Garlic is a crucial component, and its preparation can significantly impact the final product. Garlic preparation tips include roasting garlic before mincing it to bring out a sweeter, deeper flavor, or using a garlic press to ensure it’s evenly distributed throughout the garlic butter.
Preventing Cheese Leakage
One common issue with cheesy garlic bread bombs is preventing cheese leakage during baking. Ensuring the dough is sealed properly around the cheese filling and brushing the tops with egg wash can help prevent this. Additionally, not overfilling the dough with cheese can minimize leakage.
Delicious Variations to Try
From savory to sweet, explore the endless possibilities of Cheesy Garlic Bread Bombs variations. Whether you’re looking to spice up your snack game or cater to different tastes, these creative twists will elevate your Cheesy Garlic Bread Bombs experience.
Herb and Cheese Combinations
Experimenting with different herb and cheese combinations can give your Cheesy Garlic Bread Bombs a unique flavor profile. Some popular options include:
- Italian-Style: Mixing parsley, basil, and mozzarella for a classic Italian taste.
- Greek-Inspired: Combining feta cheese with oregano and thyme for a tangy twist.
Mediterranean Inspired Options
For a Mediterranean flair, try incorporating ingredients like Kalamata olives, artichoke hearts, or sun-dried tomatoes into your cheese filling.
American Classics
For a comforting, homestyle flavor, mix in some chopped chives or scallions with cheddar or Monterey Jack cheese.
Adding Protein Options
To make your Cheesy Garlic Bread Bombs more substantial, consider adding protein-rich ingredients. Some ideas include:
| Protein Option | Description |
| Cured Bacon | Diced bacon adds a smoky, savory flavor. |
| Ham or Prosciutto | Finely chopped ham or prosciutto provides a salty, meaty taste. |
| Grilled Chicken | Shredded or diced grilled chicken can add texture and lean protein. |
Sweet Dessert Versions
Yes, you can even make dessert versions of Cheesy Garlic Bread Bombs! Try using sweet ingredients like cinnamon sugar, Nutella, or fruit preserves to create a dessert treat.
Troubleshooting Your Cheesy Garlic Bread Bombs Recipe
Despite the ease of making cheesy garlic bread bombs, several common issues can arise. “The key to success lies in understanding the potential pitfalls and knowing how to overcome them,” says a renowned baking expert. In this section, we’ll explore some of the most common problems and provide practical solutions.
Fixing Dough That Won’t Rise
If your dough isn’t rising, it could be due to incorrect yeast activation or an inappropriate environment. Ensure your yeast is fresh and that the dough is placed in a warm, draft-free area. Typically, a temperature between 75°F to 80°F is ideal for rising.
Preventing Soggy Centers
Soggy centers can be a disappointment. To avoid this, make sure you’re not overfilling the bread bombs with cheese or underbaking them. Ensure they are baked until golden brown, and consider using a thermometer to check for doneness.
Dealing with Cheese Explosions
Cheese explosions can happen when the cheese inside the bread bombs melts and builds up steam. To prevent this, seal the dough properly around the cheese filling, and avoid overfilling. If you notice the cheese starting to ooze out during baking, cover the tops with foil to prevent further leakage.
Edit
Full screen
Delete
troubleshooting garlic bread
Serving Suggestions and Pairings
Discover the perfect pairings and serving ideas to make your Cheesy Garlic Bread Bombs shine. Whether you’re hosting a party or enjoying a cozy night in, these suggestions will elevate your snack game.
Dipping Sauces That Complement
The right dipping sauce can enhance the flavor of your Cheesy Garlic Bread Bombs. Consider these popular options:
- Marinara sauce for a tangy, Italian-inspired taste
- Ranch dressing for a creamy, savory experience
- Garlic aioli for an extra garlicky kick
Experiment with different sauces to find your favorite combination!
Complete Meal Ideas
Transform your Cheesy Garlic Bread Bombs into a satisfying meal by pairing them with:
| Meal Idea | Pairing Suggestion |
| Italian Feast | Serve with a fresh green salad and a side of pasta |
| Comfort Food | Pair with a bowl of hearty soup, such as tomato or creamy broccoli |
| Game Day Spread | Combine with other finger foods like chicken wings and nachos |
Party Presentation Tips
Make a great impression at your next gathering by presenting your Cheesy Garlic Bread Bombs in an appealing way. Try arranging them on a wooden serving board or a fancy platter, garnished with fresh herbs like parsley or basil.
Storage and Reheating Instructions
To keep your Cheesy Garlic Bread Bombs fresh for later, follow these simple storage and reheating tips. Proper storage and reheating are crucial to maintaining their delicious flavor and texture.
Keeping Leftovers Fresh
When storing leftover Cheesy Garlic Bread Bombs, it’s essential to cool them completely first. This prevents moisture from building up and making the bread soggy. Once cooled, place the bread bombs in an airtight container or zip-top bag. You can store them at room temperature for up to 2 days or refrigerate for up to 5 days. For longer storage, consider freezing them. To freeze, wrap each bread bomb individually in plastic wrap or aluminum foil and then place them in a freezer-safe bag.
Best Reheating Methods
Reheating your Cheesy Garlic Bread Bombs can be done in several ways, depending on your preference and available appliances. Here are some effective methods:
- Oven Reheating: Preheat your oven to 350°F (175°C). Place the bread bombs on a baking sheet lined with parchment paper and bake for 5-7 minutes, or until heated through.
- Microwave Reheating: For a quicker option, microwave the bread bombs for 20-30 seconds. Be cautious as the cheese can get very hot.
- Air Fryer Reheating: Preheat your air fryer to 320°F (160°C). Cook the bread bombs for 2-3 minutes, shaking halfway through.
By following these storage and reheating tips, you can enjoy your Cheesy Garlic Bread Bombs for days to come, ensuring they remain as delicious as when first baked.
Conclusion: Enjoying Your Homemade Cheesy Garlic Bread Bombs
Now that you’ve mastered the art of making cheesy garlic bread bombs, it’s time to indulge in the delightful experience of homemade garlic bread enjoyment. With this cheesy garlic bread bombs recipe conclusion, you’re equipped to create a dish that’s sure to impress family and friends.
As you take your first bite, the gooey cheese and savory garlic meld together in perfect harmony, creating a truly irresistible treat. Whether you’re serving these bread bombs as a snack, appetizer, or side dish, they’re sure to be a hit.
Feel free to experiment with different variations and share your experiences with others. The joy of homemade cooking lies in the freedom to create and share delicious moments with loved ones. So go ahead, savor the flavor of your cheesy garlic bread bombs, and enjoy the satisfaction of a job well done.
FAQ
What is the best type of cheese to use for cheesy garlic bread bombs?
Mozzarella, cheddar, or a blend of mozzarella and parmesan are popular cheese options for cheesy garlic bread bombs, offering a great balance of flavor and melt.
Can I make cheesy garlic bread bombs ahead of time?
Yes, you can prepare the dough and cheese filling in advance, but it’s best to assemble and bake them just before serving to ensure optimal flavor and texture.
How do I prevent cheese from leaking out during baking?
To prevent cheese leakage, make sure to seal the dough properly around the cheese filling, and avoid overfilling the bread bombs.
What are some variations I can try with the cheesy garlic bread bombs recipe?
You can experiment with different herbs, spices, and cheese combinations, or add protein like ham or bacon to create unique flavor profiles.
How do I store leftover cheesy garlic bread bombs?
Store leftover cheesy garlic bread bombs in an airtight container at room temperature for up to 2 days or freeze for up to 2 months.
How do I reheat cheesy garlic bread bombs?
Reheat cheesy garlic bread bombs in the oven at 350°F (175°C) for 5-7 minutes, or until crispy and warm, or microwave for 20-30 seconds.
Can I use a different type of dough for cheesy garlic bread bombs?
Yes, you can experiment with different dough recipes, such as pizza dough or focaccia dough, to create varying textures and flavors.
What dipping sauces pair well with cheesy garlic bread bombs?
Marinara sauce, garlic aioli, or a simple mix of olive oil and parsley are great dipping options that complement the flavors of cheesy garlic bread bombs.